Just found this when I was sorting out some mail... It's from the maintenance course I did last year (2007).
Tyres:
- Thread depth (legal minimum of 1mm, in reality should be much more)
- Sidewall condition (check for cracks, rips, gouges or damage)
Wheels:
- Check for loose spokes (if applicable), flat spots and trueness (with each wheel raised, spin them). For the front wheel put the bike on the centre stand and get another person to lean on the back and for the rear it should be enough to have the bike on the centre stand. If there is no centre stand you can balance the bike on the side stand carefully and carry this out.
- Check bearings (with the wheel raised look for side to side movement)
Steering:
- Check headrace (with wheel raised pull back and forward on forks)
- Check control cables (check all for ease of movement and free play)
- Check fork seals (check for oil under and around seal covers)
- Check wheel alignment (run a chord or string from the front wheel to the rear)
Electrical system:
- Check electric start (engine should turn over quickly and start instantly)
- General electrics (check all lights [indicators, main beam, dipped beam, high beam, brake light, number plate light], horn, kill switch, passing light (if present), oil pressure light, neutral light)
- Charging system (with high beams on allow to idle, lights should brighten when revved)
Engine:
- Check engine oil level (oil should be filled to upper level)
- Check exhaust fumes (should be colourless if 4 stroke, slightly blue if a two stroke)
- Check engine noise (should be quiet with no chain or tapping like noises)
Drive system:
- Chain/sprockets (check chain tension and slack. Pull chain at back off rear sprocket [you shouldn't be able to do this!], check condition of sprocket teeth)
- Drive shaft (check for excess movement in wheel and whine when driven)
Brake systems:
- Hydraulic (check oil level, check pads for wear and check for oil leaks and freeness of wheel. there should be a slight brake drag.)
- Mechanical (check brake arm wear indicator, check brake cable for snapped strands and dragging)
Clutch system:
- Hydraulic (check oil levels and leaks, check for clutch drag and slipping)
- Mechanical (check cable for snapped strands, clutch drag and slipping)
Fuel system:
- Carbs/injectors (check for leaks and smell of fumes, start from cold with full choke, turn off choke and engine should idle)
This is by no means a complete list in my opinion but if you're buying a bike and all of these look good then chances are the bike is ok.
Thieving little...thieves
Came out of work on Friday to the bike. Took the locks off it and switched on the ignition. Noticed first that the bike wasn't in neutral and next that the killswitch was set to 'run' (I always switch it off). First thought was, some kid was sitting on the bike. Down the road a bit though I noticed that the rev counter was working but that the speedo cable was broken... *sigh*
I'll have to get a new speedo cable for it and look into getting either an alarm or an immobiliser fitted too. Bah! Annoying!!
I'll have to get a new speedo cable for it and look into getting either an alarm or an immobiliser fitted too. Bah! Annoying!!
Bar ends and indicators
Apologies for the lack of updates. Have been really busy in work. Haven't even had the chance to give the bike a clean or winter prep yet. Anyway, to fix up some of the damage done from when I dropped the bike I got Carbon bar ends and small oval indicators from Halfords.
Two stumbling blocks arose when I got around to doing the repairs... The indicators were 23w (but still 12v) so I wasn't sure if they would work or not. They also had two wires (one black, one black with a white stripe) which didn't match the colours on the bike. In addition, the bar end on the left hand side was spinning but wouldn't come out. I posted to biker.ie to get a bit of advice about the indicators and the lads put me on the right track.
Honda's in general have:
- Green = Earth
- Orange = Live (LHS)
- Light Blue = Live (RHS)
After talking to one of the lads in Northside Motorcycles I found out it didn't matter which wire went to which on the new ones, the indicator relay would take care of it. In the end I put the black/white wire into earth and the black wire into live on both sides.
Replacing the indicators is easy enough but there are a few bolts which need to be undone. The headlight assembly needs to come off for the front indicators and the saddle, grab rail, rear bars (don't know the name for these, they're highlighted in the photo) and tail unit (seat cowl for ye yanks) will have to come off for the rear indicators to be done. Here are instructions on how to remove the tail unit and also how to dismantle the headlight assembly (both todo for the moment, sorry!)
The bar ends annoyed me somewhat. The one on the right hand side screwed out straight away leaving the handlebar insert in place. Because the left hand one was bent though, it meant that not matter how much I screwed it counterclockwise (lefty loosey, righty tighty!!) the bar end wouldn't budge. Eventually I took a hacksaw to the bar end and it fell away with a satisfying *ping*.
Bar end weights aid in the steering of the bike and vibration in the handlebars. I was worried that they might affect the handling of the bike but so far they don't seem to have changed the feel much and they look a lot better than the old ones. If you want to know the theory behind bar end weights, Manic Salamander has a Bar End FAQ.
The old bar ends:

The new ones:

(Would ya look at the filth of that front caliper... must get that cleaned up and sort out some new brake pads!)
The new indicators are a lot smaller than the old ones (which look like elephants ears when you compare them) but after a while I got used to the look of them and now I think they actually quite suit the bike. Here's a comparison pic for you... (excuse the rubbish lighting in the new pictures, it was twilight when I was taking them...I'll try to take some better pictures during the daytime soon).
Front indicator comparison:

Rear indicator comparison:

Now I'm wondering do I keep the headlight the same or change it for twin "streetfighter" headlights? Ah, where will the spending end!! The other option there is either to get the current headlight rechromed or to have it media blasted and to paint/powdercoat it black...
To windshield or not to windshield
So, while looking at repairing the indicators after I dropped the bike I had to remove the headlight. When I started loosening the bolts (12mm bolts, one each side) I noticed the windshield was coming loose. Afraid I had broken one of the fixings when I dropped the bike last Sunday I took hold of it from the top in order to keep undoing the headlight bolt and the entire windshield came off the bike in my hands.
Only when I looked at it did I realise that it was that way by design and that I hadn't broken it *phew*! I've kept it off the bike for the moment. It certainly makes the CB look a lot meaner but the difference while riding is noticable. At speeds of 50/60 km/h (30/40 mph for you imperial nuts) there is a noticable pressure on my chest. Not like someone punching me but a consistent push from the wind all the same. Once I sort the indicators I'll probably put the windshield back on (after a good polish and clean up of course).
Here are some pics for those interested:
Front:

From the side:

Detail of the fitting that slots onto the headlight bolt:

I'll throw up some pics comparing the bike with and without the windshield soon too.
Edited 25/10/08: Headlight bolts are 12mm not 14mm
Dropped the bike yesterday...
Bah, so embarrasing. Grabbed a handful of brake when I shouldn't have on gravel in a car park. Bike went from underneath me. Ended up dropping the Cibby. Smashed the front left indicator, bent the bar end and cracked the rear left indicator. Going to replace all of the indicators with ones I bought in Halfords and also replace the stock bar ends with carbon fibre ones.
Will post some pictures of the damage and of the repairs also soon.
Update 25/10/08: Pictures of the damage. Circled in green in the gimp (my first attempt so forgive the amateurish nature of the circles) and a close up of the engine casing damage.
Damaged areas:

The Engine casing (well, gear box casing really):

There's also a slight dent in the front left hand side of the tank from where the handlebars must have hit (either that or a large rock) which I'll get taken out when I respray the bike.
Taxing Times
Normally in Ireland you can do your Motor Tax online. There are only a number of instances in which you can't. Otherwise you either have to go to the Motor Tax Office yourself, or send in a form (accompanied by your Registration Cert) by Post.
One such instance is if the bike has been out of tax for more than three months. I knew that the person I bought the bike from hadn't taxed it so I rang the Tax Office to find out how long it was out of tax. November, 2006. That's right. Two years!
Luckily, you are only liable for tax on a bike since the date you purchased it. Furthermore, if you can prove the bike was off the road (usually just a signature on a form from the Garda Siochana) you won't be liable until you've sent the form in. I decided to not bother with the form signing lark and sent the RF100 in with the Reg Cert.
Tax for the year was €73, with a €14 penalty for late payment. Not bad all in all. I also bought a tax disc holder from Liam at LME Motorcycles for 15 yoyos.

Most tax disc holders work the same way. They've got allen key bolts with small number 4 nuts (that's what she said) at the rear. Undo the six allen bolts, put the disc underneath the rubber seal and redo the bolts. The holder and bolt detail are shown in the picture below.

Tax discs must be fitted to the left hand side of your bike in Ireland (so if you are stopped both the Garda can inspect the disc safely and not with his behind in traffic!) and also must not cover the registration number in any way. This was a famous trick of bikers over the years but recently has been clamped down on with hefty fines for doing so. So, to keep in line with these two regulations I decided to fit the tax disc holder to the chain gaurd just above the swingarm. It's nicely protected from being kicked/bumped off to easily and it's concealed from the eyes of passing thieves (well, the unobservant ones anyway).

Some pics...
So I'll give it to you straight. No arty angles or half naked birds on it or anything (well, not yet... heh heh)
From the front:

From the Right hand side:

Left hand side:
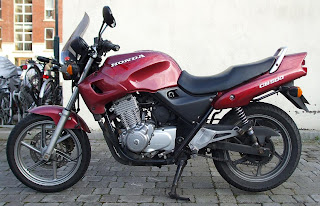
and from the rear (that's what she said):

From the front:

From the Right hand side:

Left hand side:

and from the rear (that's what she said):

The First Service
One of the main reasons I bought an older bike was so I could fix it up myself. I had originally intended to buy a bike that totally wasn't running, ride my DT during the week and fix it up in my spare time but things change. I nearly completed (missed the last evening) the Motorcycle Maintenance course in Rosmini run by Martin Cummins so I felt up to the challenge.
So anyway, once I got the bike home had a good long look at it. Then I had a cup of tea and took another good long look at it. My mate Ted told me "You should get that bike serviced pronto lad" so I took his advice, picked up:
The air and oil filter came from Hi Flo Filtro and the spark plugs are NGK's.
Also grabbed some rags (Tesco value dishcloths, they're savage for the cleaning) and a large bottle of white spirits. Headed down to Ted's gaff on a saturday and got to doing the service. We loosely followed the DIY servicing guide from the CB500 owners club.
To start off, we let the bike rest a little and had a cup of tea. Given the engine was still too warm to do the oil change straight away we started off by cleaning the bike. Took off the two small front fairings, the two side panels, the seat and undid the bolt for the petrol tank. Instead of trying to take the petrol tank off (there was still a fair amount of fuel in it) we just propped it up on a mallet. Since the engine was still cooling, ted went about cleaning the chain of all the accumulated gunk and grime. He soaked a dishcloth in white spirits and held it against the chain while I slowly turned the rear wheel. The amount of crap that came off the chain didn't bear thinking about!
Spark plugs were first to come out. I'd say they hadn't been changed in a good while. No worrying discolouration on them but they were definitely due a change. In with the new ones and reconnected the HT leads. Cleaned the fairings and side panels with white spirits both sides and then wiped down with WD-40 on the outside. LM grease on the rubber "rivets" and cleaned up the bolts with WD before fitting the fairings and side panels back on. Replaced the first two bolts on the bike with hex head bolts for the side panels. The ones that were on it had definitely seen better days. They're the first of many I'll replace.
Next up was replacing the air filter. Three 8mm bolts need to be removed and the air filter just slides out like a cassette. If the air filter gets stuck there's a cover on the other side which has 2 cross-head screws on it, remove that and you can push out the air filter. Now, changing the air filter leads me to believe it had been in there for quite some time on this bike because one of the bolts was spinning in the casing. Read here for more information on that one. Anyway, couldn't get the last bolt out and didn't want to be grinding off a bolt right beside the petrol tank so I undid the other two bolts and spun the casing around the last one and replaced the filter.
By this time the engine had cooled enough for the oil to be viscous but not burning hot. So I took out the oil filler cap / dipstick. Slowly undid the bolt on the bottom of the sump. Once it was loose enough to be able to undo it with my hand I put the wrench aside and with upward pressure took the bolt out. With the oil change you should put down plenty of newspaper and have a container large enough to hold 4 litres of oil. Then I let the oil drain from the bike. It'll take about 5 minutes to fully drain and there'll always be a few drips you don't expect. I took this time to give the sump nut a bit of a clean. Then, keeping the newspaper in place to prevent any sullying of the driveway I moved the oil container forward until it was underneath the oil filter.
The oil filter unscrewed easily enough with an oil filter wrench. I used the type that looks a touch like a cross between a g-clamp and a jubilee clip. Let the oil come out of that, wrap it in newspaper and put it aside. (They can be used as rifle silencers if you want to reuse them!) Screwed the new one on hand-tight and I was nearly done. I torqued it slightly with the oil filter wrench also just to make sure it was on properly but according to the Haynes hand-tight is OK.
Then filling the new oil was next. Remember that most bikes will have how many cc's of oil to put into the engine but they don't neccessarily include the amount that sits in the oil filter. That was a handy tip from Ted. I poured the oil in slowly and with the aid of a funnel a litre at a time for 3 litres. Then I put in the dipstick (without screwing it on) and checked the level. Started the bike for a brief couple of seconds (with the dipstick on!!) and poured about another 200ml of oil into the engine. Each time I poured a little more oil in I checked the level. When the oil was finally near enough to the max mark but not too close I screwed on the dipstick and started the bike for 30 seconds. Then one last check of the oil level.
So that was it... Service nearly over. Made sure I had both the fairings on properly, the tank back on securely, the seat back on properly and that I didn't have any spare bolts lying around. Then a final check of all of the bolts I had loosened to make sure they were on tight.
Finally, I put some chain lube on the chain (it was in serious need of it!) and tidied up the tools. Then after another cuppa spun home. Quite an enjoyable evening spent servicing the bike all in all and a decent start on spanner work on the bike.
So anyway, once I got the bike home had a good long look at it. Then I had a cup of tea and took another good long look at it. My mate Ted told me "You should get that bike serviced pronto lad" so I took his advice, picked up:
- 2 new spark plugs - NGK CR8EH-9
- 10w30 oil
- new oil filter
- new air filter
The air and oil filter came from Hi Flo Filtro and the spark plugs are NGK's.
Also grabbed some rags (Tesco value dishcloths, they're savage for the cleaning) and a large bottle of white spirits. Headed down to Ted's gaff on a saturday and got to doing the service. We loosely followed the DIY servicing guide from the CB500 owners club.
To start off, we let the bike rest a little and had a cup of tea. Given the engine was still too warm to do the oil change straight away we started off by cleaning the bike. Took off the two small front fairings, the two side panels, the seat and undid the bolt for the petrol tank. Instead of trying to take the petrol tank off (there was still a fair amount of fuel in it) we just propped it up on a mallet. Since the engine was still cooling, ted went about cleaning the chain of all the accumulated gunk and grime. He soaked a dishcloth in white spirits and held it against the chain while I slowly turned the rear wheel. The amount of crap that came off the chain didn't bear thinking about!
Spark plugs were first to come out. I'd say they hadn't been changed in a good while. No worrying discolouration on them but they were definitely due a change. In with the new ones and reconnected the HT leads. Cleaned the fairings and side panels with white spirits both sides and then wiped down with WD-40 on the outside. LM grease on the rubber "rivets" and cleaned up the bolts with WD before fitting the fairings and side panels back on. Replaced the first two bolts on the bike with hex head bolts for the side panels. The ones that were on it had definitely seen better days. They're the first of many I'll replace.
Next up was replacing the air filter. Three 8mm bolts need to be removed and the air filter just slides out like a cassette. If the air filter gets stuck there's a cover on the other side which has 2 cross-head screws on it, remove that and you can push out the air filter. Now, changing the air filter leads me to believe it had been in there for quite some time on this bike because one of the bolts was spinning in the casing. Read here for more information on that one. Anyway, couldn't get the last bolt out and didn't want to be grinding off a bolt right beside the petrol tank so I undid the other two bolts and spun the casing around the last one and replaced the filter.
By this time the engine had cooled enough for the oil to be viscous but not burning hot. So I took out the oil filler cap / dipstick. Slowly undid the bolt on the bottom of the sump. Once it was loose enough to be able to undo it with my hand I put the wrench aside and with upward pressure took the bolt out. With the oil change you should put down plenty of newspaper and have a container large enough to hold 4 litres of oil. Then I let the oil drain from the bike. It'll take about 5 minutes to fully drain and there'll always be a few drips you don't expect. I took this time to give the sump nut a bit of a clean. Then, keeping the newspaper in place to prevent any sullying of the driveway I moved the oil container forward until it was underneath the oil filter.
The oil filter unscrewed easily enough with an oil filter wrench. I used the type that looks a touch like a cross between a g-clamp and a jubilee clip. Let the oil come out of that, wrap it in newspaper and put it aside. (They can be used as rifle silencers if you want to reuse them!) Screwed the new one on hand-tight and I was nearly done. I torqued it slightly with the oil filter wrench also just to make sure it was on properly but according to the Haynes hand-tight is OK.
Then filling the new oil was next. Remember that most bikes will have how many cc's of oil to put into the engine but they don't neccessarily include the amount that sits in the oil filter. That was a handy tip from Ted. I poured the oil in slowly and with the aid of a funnel a litre at a time for 3 litres. Then I put in the dipstick (without screwing it on) and checked the level. Started the bike for a brief couple of seconds (with the dipstick on!!) and poured about another 200ml of oil into the engine. Each time I poured a little more oil in I checked the level. When the oil was finally near enough to the max mark but not too close I screwed on the dipstick and started the bike for 30 seconds. Then one last check of the oil level.
So that was it... Service nearly over. Made sure I had both the fairings on properly, the tank back on securely, the seat back on properly and that I didn't have any spare bolts lying around. Then a final check of all of the bolts I had loosened to make sure they were on tight.
Finally, I put some chain lube on the chain (it was in serious need of it!) and tidied up the tools. Then after another cuppa spun home. Quite an enjoyable evening spent servicing the bike all in all and a decent start on spanner work on the bike.
To Do
So here's the To Do list for the bike at the moment. I'll add things to it and mark things off as done every once and a while (more like when I get around to it!), any suggestions as to upgrades or modifications are more than welcome, just post a comment below.
(In no particular order!!)
Oil change - done
New oil filter - done
New spark plugs (2) - done
Clean off crud from chain and apply oil (ongoing) - done
Replace air filter - done
Clean up fairings and tank - done
Replace rear view mirrors - done
Clean front wheel - done
Adjust gear selection lever - done
Tax Bike and Fit tax disc holder - done
Clean rear wheel
Spray forward controls black
Spray footpeg metal
Replace footpegs
Refurbish bar end weights - done
Replace front brake and clutch levers (black)
Change brake line and clutch cable (with braided hoses)
Remove windshield (maybe in the summer)
Replace/refurbish chrome on headlamp
Change bulb on headlamp for xenon or similar
Change coolant
Replace jubilee clips on coolant hoses
Spray grabrail black
Remove exhaust and refurbish
Remove header pipes and refurbish (possibly wrap them?)
Clean rad cover
Clean radiator and restore paint on sides
Repair seat (torn at rear)
Install immobiliser
Add disc lock holder to rear footpeg
Adjust slack in chain
Clean up rear swingarm
Replace fork seals
Refurbish fork legs
Change brake pads (front and rear)
Clean brake calipers (front and rear)
Fix steering lock mechanism (locks to the right but not to the left)
Fix stiff choke
Repair either valve or slow puncture in front tyre (possibly replace both tyres for winter)
Refurbish handlebars
Add locking valve caps
Check valve clearances (and possibly replace shims)
Install quick release fuel coupler
New Fuel filter (this is inside the tank, could be tricky)
New HT leads
Replace indicators with more modern ones, not super small but potentially LED ones - done
Install LED "running lights" into new footpegs (diagram this idea)
Fuel gauge for clocks (no more relying on tripometer)
Sure may aswell have a clock too!
Change fork oil
Replace handlebar grips
Add a fenda-extenda (mudflap)
Possibly add a rear hugger
Respray all fairings black (and fill in Form R111 for motor tax purposes)
Get a genuine toolkit (or a genuine tool bag and quality tools to suit)
Replace all bolts with hex bolts (get a tub of bolts from horsepower.ie)
Replace engine bolts (careful with this, will need a bottle-jack)
New cap pivot (there's one missing)
Balance carbs
Change brake fluid
Eventually I'll probably rejet the carbs, put on a carbon exhaust and throw in a K&N air filter too.
Found this page great as a parts reference page http://www.cmsnl.com/search.php?model_id=1580
Possibly also replace the footpegs with MX style ones
I'll be adding things to this list over time too, so keep an eye out.
(In no particular order!!)
Clean rear wheel
Spray forward controls black
Spray footpeg metal
Replace footpegs
Replace front brake and clutch levers (black)
Change brake line and clutch cable (with braided hoses)
Remove windshield (maybe in the summer)
Replace/refurbish chrome on headlamp
Change bulb on headlamp for xenon or similar
Change coolant
Replace jubilee clips on coolant hoses
Spray grabrail black
Remove exhaust and refurbish
Remove header pipes and refurbish (possibly wrap them?)
Clean rad cover
Clean radiator and restore paint on sides
Repair seat (torn at rear)
Install immobiliser
Add disc lock holder to rear footpeg
Adjust slack in chain
Clean up rear swingarm
Replace fork seals
Refurbish fork legs
Change brake pads (front and rear)
Clean brake calipers (front and rear)
Fix steering lock mechanism (locks to the right but not to the left)
Fix stiff choke
Repair either valve or slow puncture in front tyre (possibly replace both tyres for winter)
Refurbish handlebars
Add locking valve caps
Check valve clearances (and possibly replace shims)
Install quick release fuel coupler
New Fuel filter (this is inside the tank, could be tricky)
New HT leads
Install LED "running lights" into new footpegs (diagram this idea)
Fuel gauge for clocks (no more relying on tripometer)
Sure may aswell have a clock too!
Change fork oil
Replace handlebar grips
Add a fenda-extenda (mudflap)
Possibly add a rear hugger
Respray all fairings black (and fill in Form R111 for motor tax purposes)
Get a genuine toolkit (or a genuine tool bag and quality tools to suit)
Replace all bolts with hex bolts (get a tub of bolts from horsepower.ie)
Replace engine bolts (careful with this, will need a bottle-jack)
New cap pivot (there's one missing)
Balance carbs
Change brake fluid
Eventually I'll probably rejet the carbs, put on a carbon exhaust and throw in a K&N air filter too.
Found this page great as a parts reference page http://www.cmsnl.com/search.php?model_id=1580
Possibly also replace the footpegs with MX style ones
I'll be adding things to this list over time too, so keep an eye out.
Intro
I bought my Honda CB500 on the last day of June 2008. It was first registered in Great Britain in 1997 and imported to Ireland sometime in 2001.
It's in fairly tidy shape for it's age (11 years old, almost the same age as my nephew!) and I christened it by taking it from Galway back to Dublin on ~200km of a trip.
I'll post up a few pics of it shortly.
I'll be doing a To Do list for it also and will update my progress as I go along. Have the trusty Haynes which came with it at purchase (thanks TB!).
With ~52,500km on the clock it's done a lot but with the engine rated for 300,000km it's got a whole lot more to do!